

How we made an HDR rig for VR test drive Jaguar F Pace. Part 1. Preproduction
125 bolts, 10 iron plates, 2 rubber sheets, 1 veneer sheet, 3690 rotoscoped frames, 250-hour rendering and a month of tests or how we were making a HDR rig for shooting Jaguar F-Pace 360 video.
Do it great or die trying?
The Jaguar/Land Rover/Autoplus company set ourselves a task – to shoot a 360 video of a new crossover from a driver’s perspective for virtual test drive to make a future car owner to get unforgettable emotions and ultimate experience without leaving the car store and request a real test drive in days to come. In a nutshell, we needed to make so much cool video for virtual reality so that a client would want to buy the car having watched it.
We got started.
You would think, a piece of cake – set the camera and here you go. However, when we had watched a great many similar videos, we faced numerous problems and difficulties that made us panic.

Here they are:
Problem #1: Exposition.
It’s different inside and out of the car, and this complicates the task tremendously. Let’s explain it by the examples from references we found:
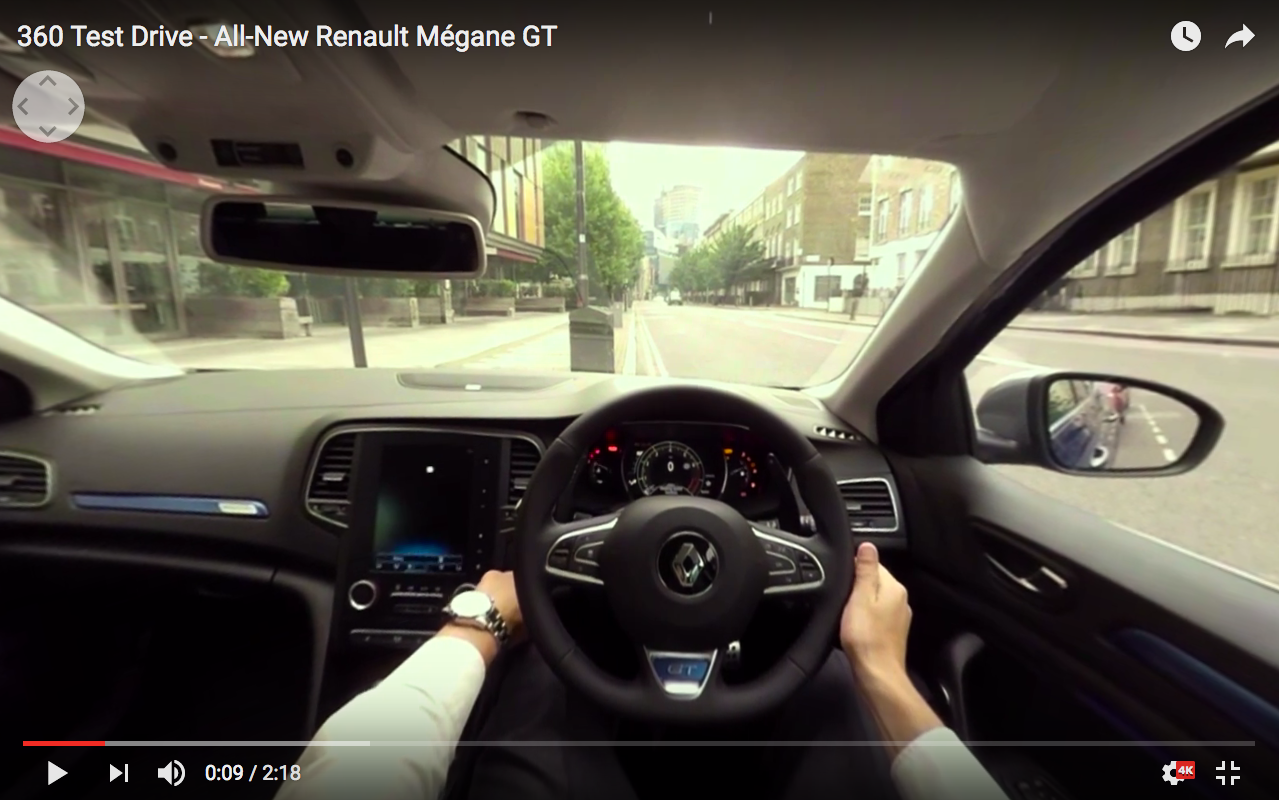
360 Test drive Renault Megane. Pay attention to the cabin and street. The cabin is underexposed, street is overexposed.
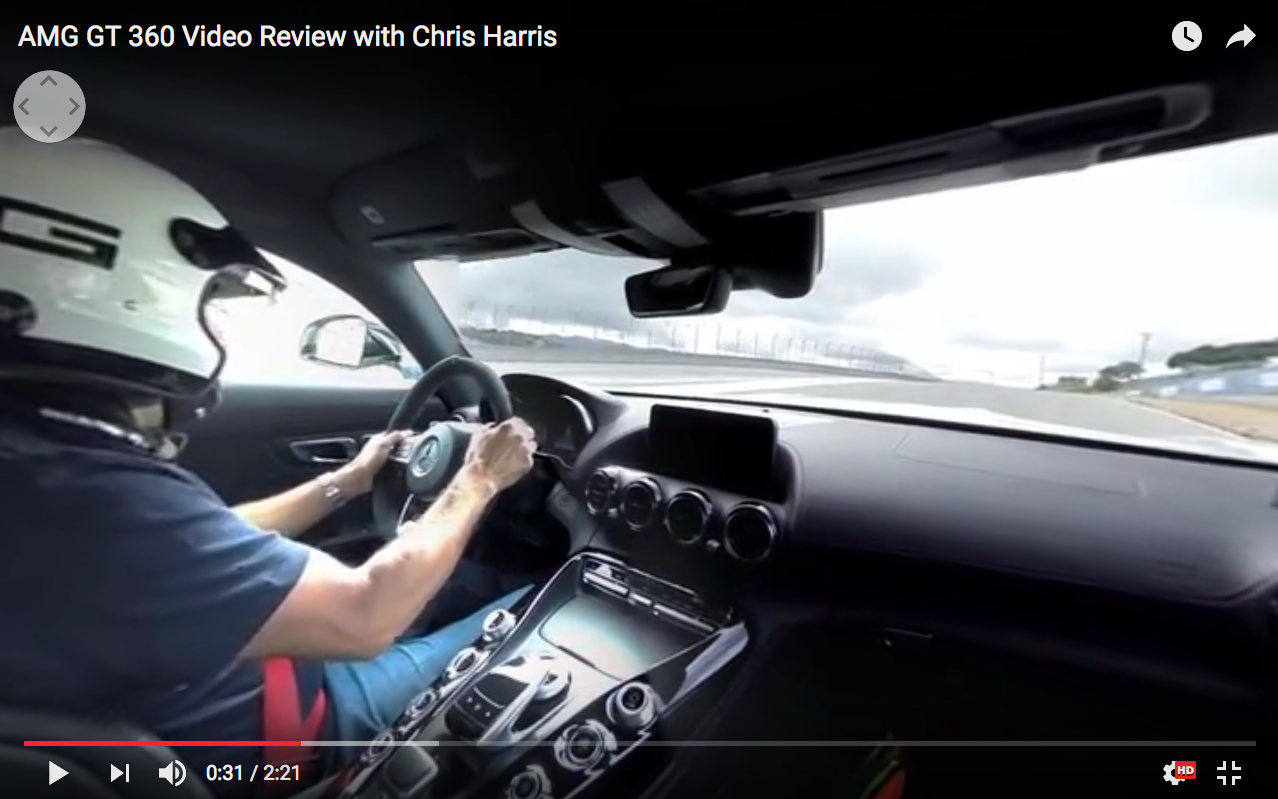
The same thing is with Mercedes AMG GT.
Mercedes E class – correct exposition in the cabin, but outside it’s messed up.

How to avoid it? We had to answer the question.
Problem #2: Stitching*.
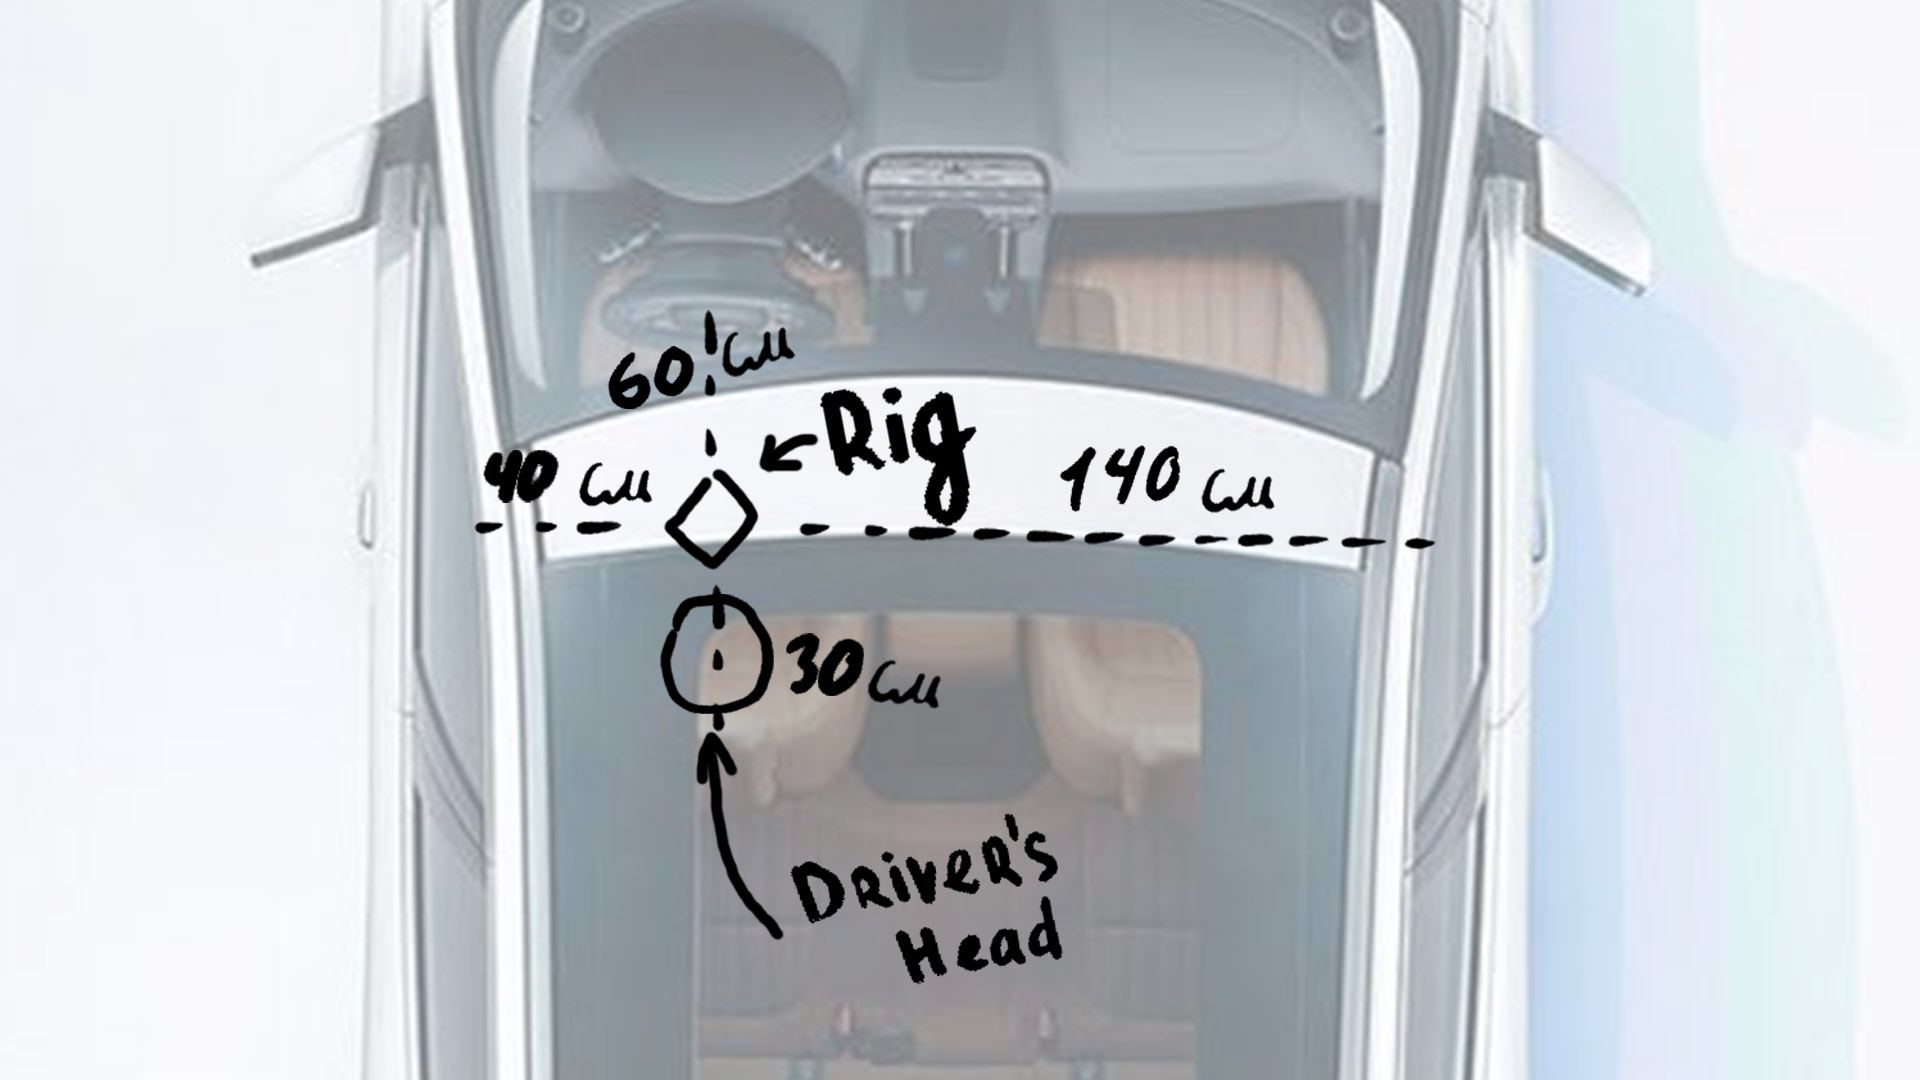
A distance between objects in the car and cameras can be just 10 cm!
GoPro in such a case is not enough, because when stitching parallax errors* become particularly apparent on the objects close to the camera.
Problem #3: Parallax*.
We noticed parallax distortion in neighboring windows,

and sometimes in just one window in references.

It is due to the difference between the interior and exterior parallax. And stitching is done by the interior. It’s practically impossible to recover these stitches and strange distortion when shooting on the move.
Problem #4: Occlusion*.
We faced this problem following the first test. The grip and the driver obstructed rear and upper windows.
That’s how our colleagues “solved” the problem.

So we watched these videos over and over. Probable solutions turned into disputes, but nothing was born out of them. We were pushed to the limit, but kept thinking.
Suddenly it occurred to us. Idea! A simple idea that could solve all these problems.
Two rigs in one.
IDEA
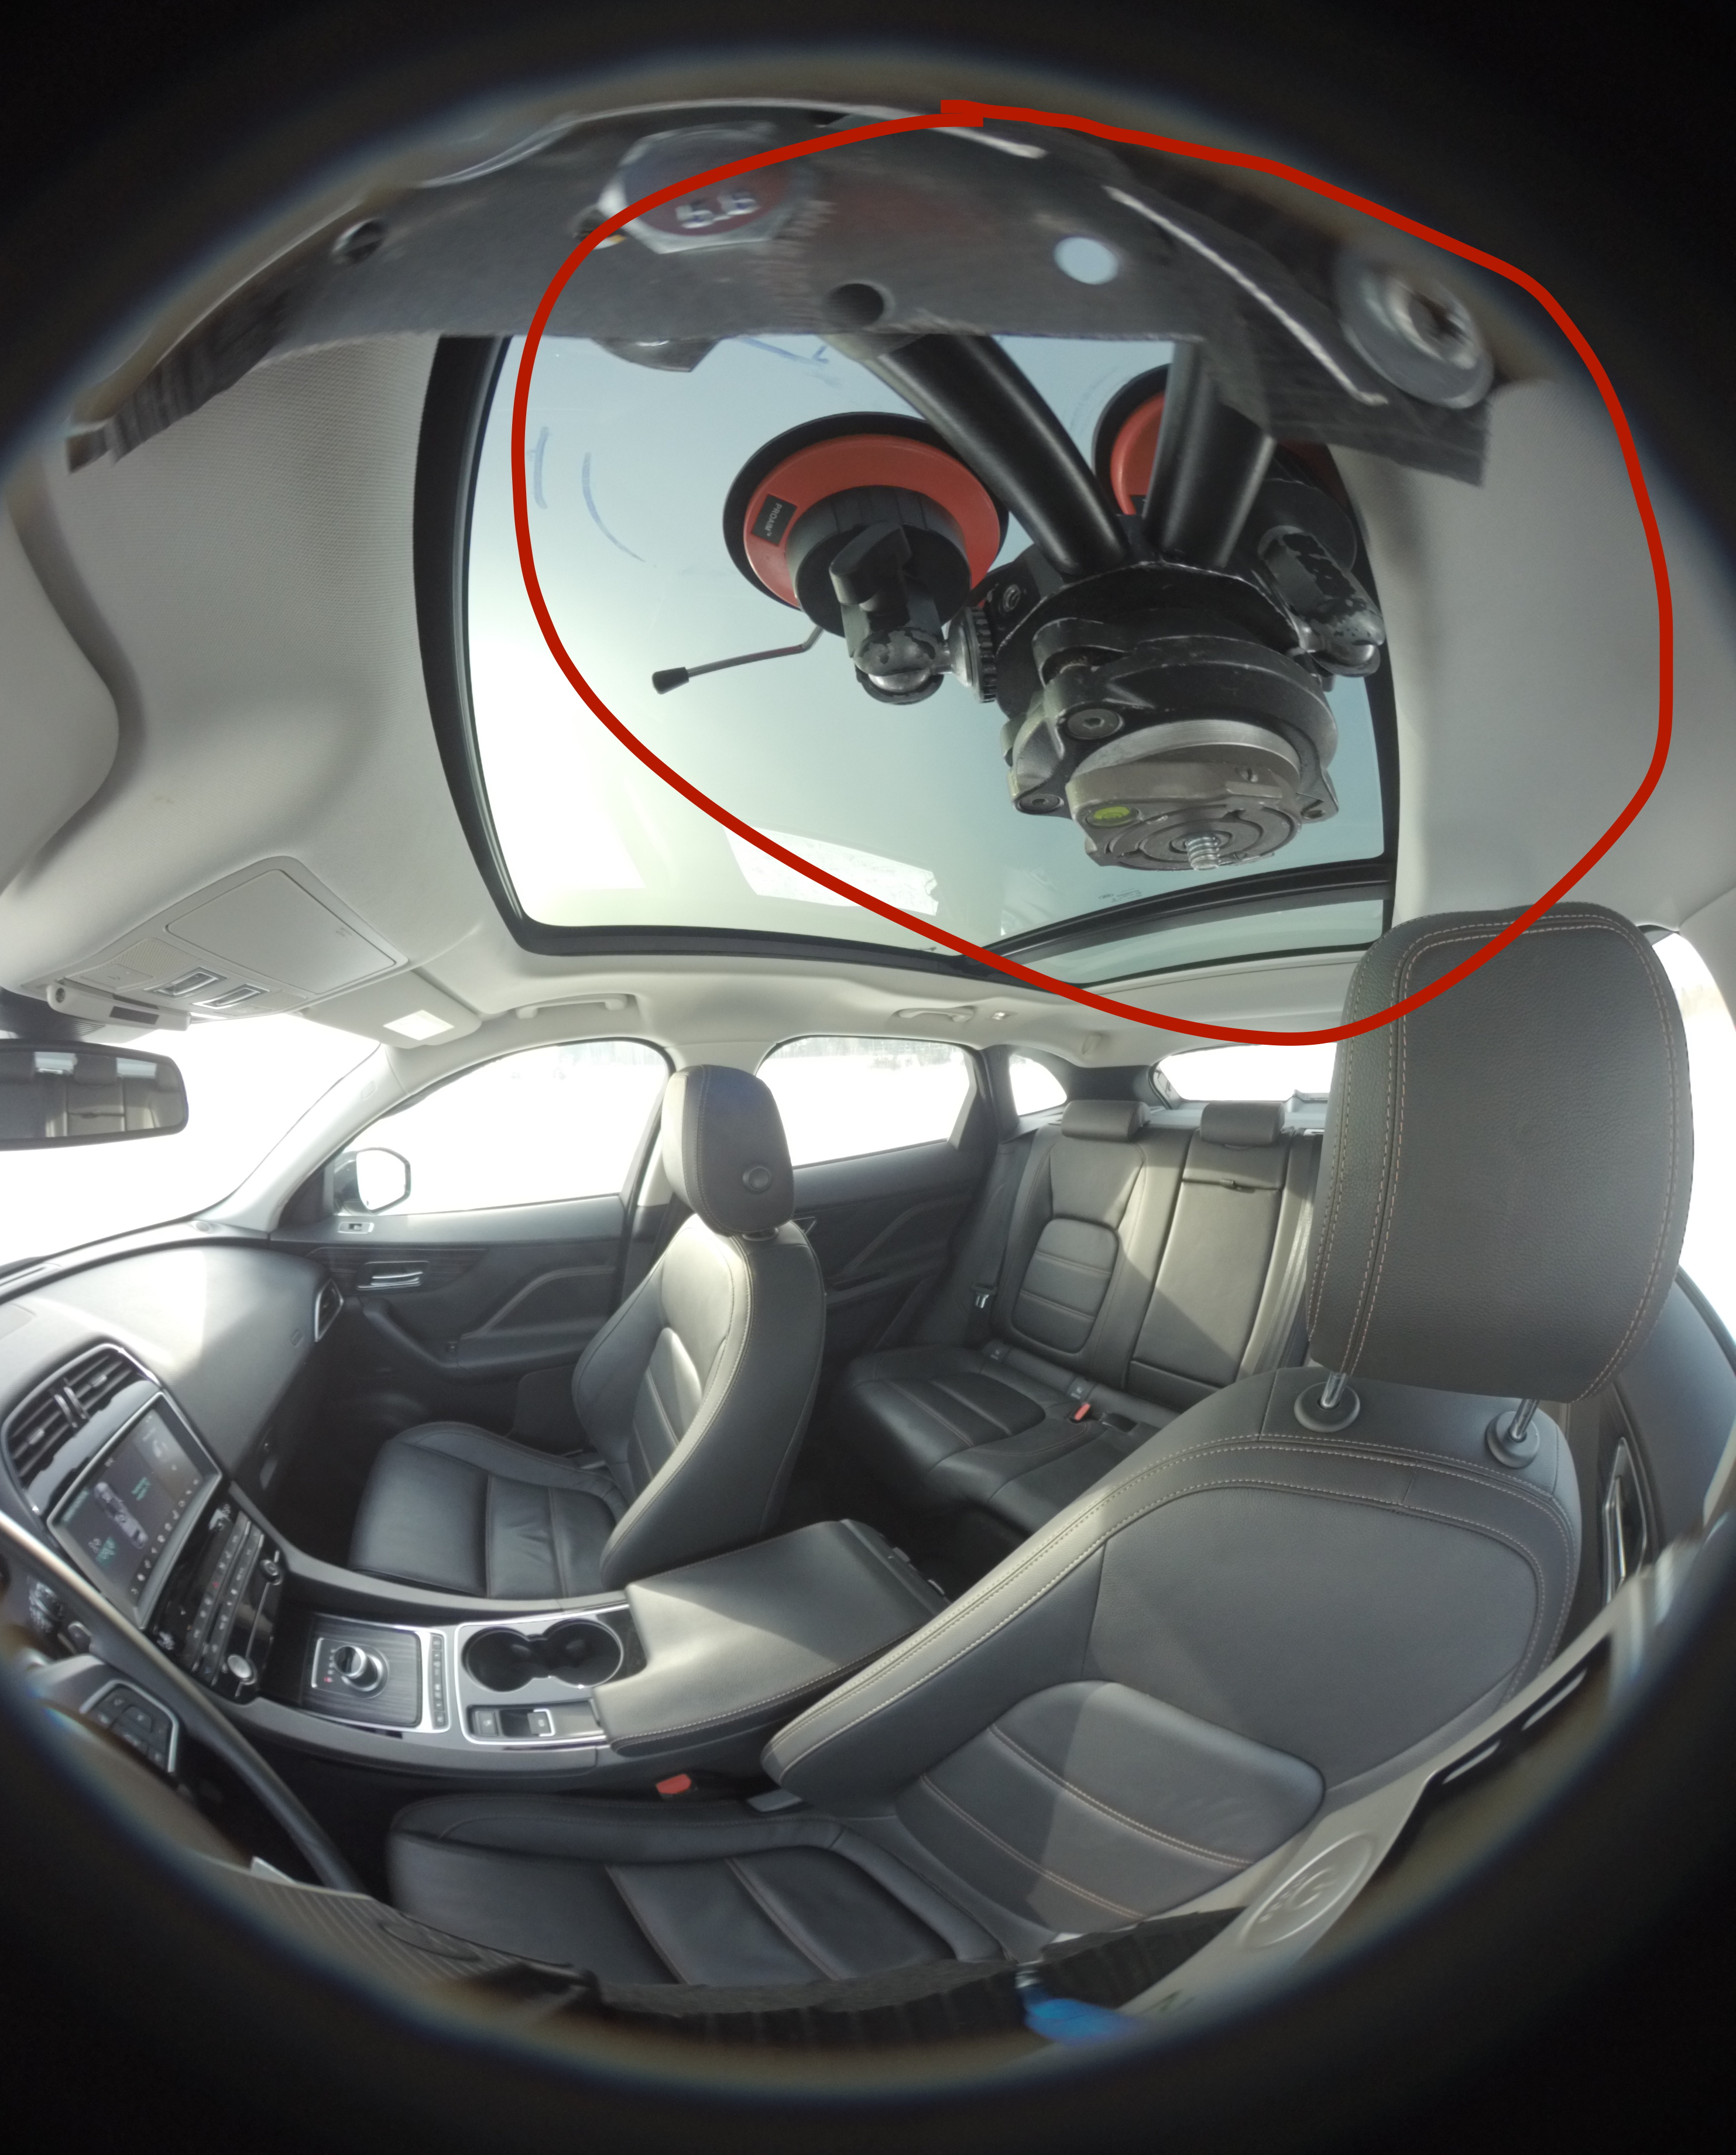
Firstly, we made a decision to assemble a rig from three custom GoPro 4 Black with Japanese lens Entaniya Fisheye 220.
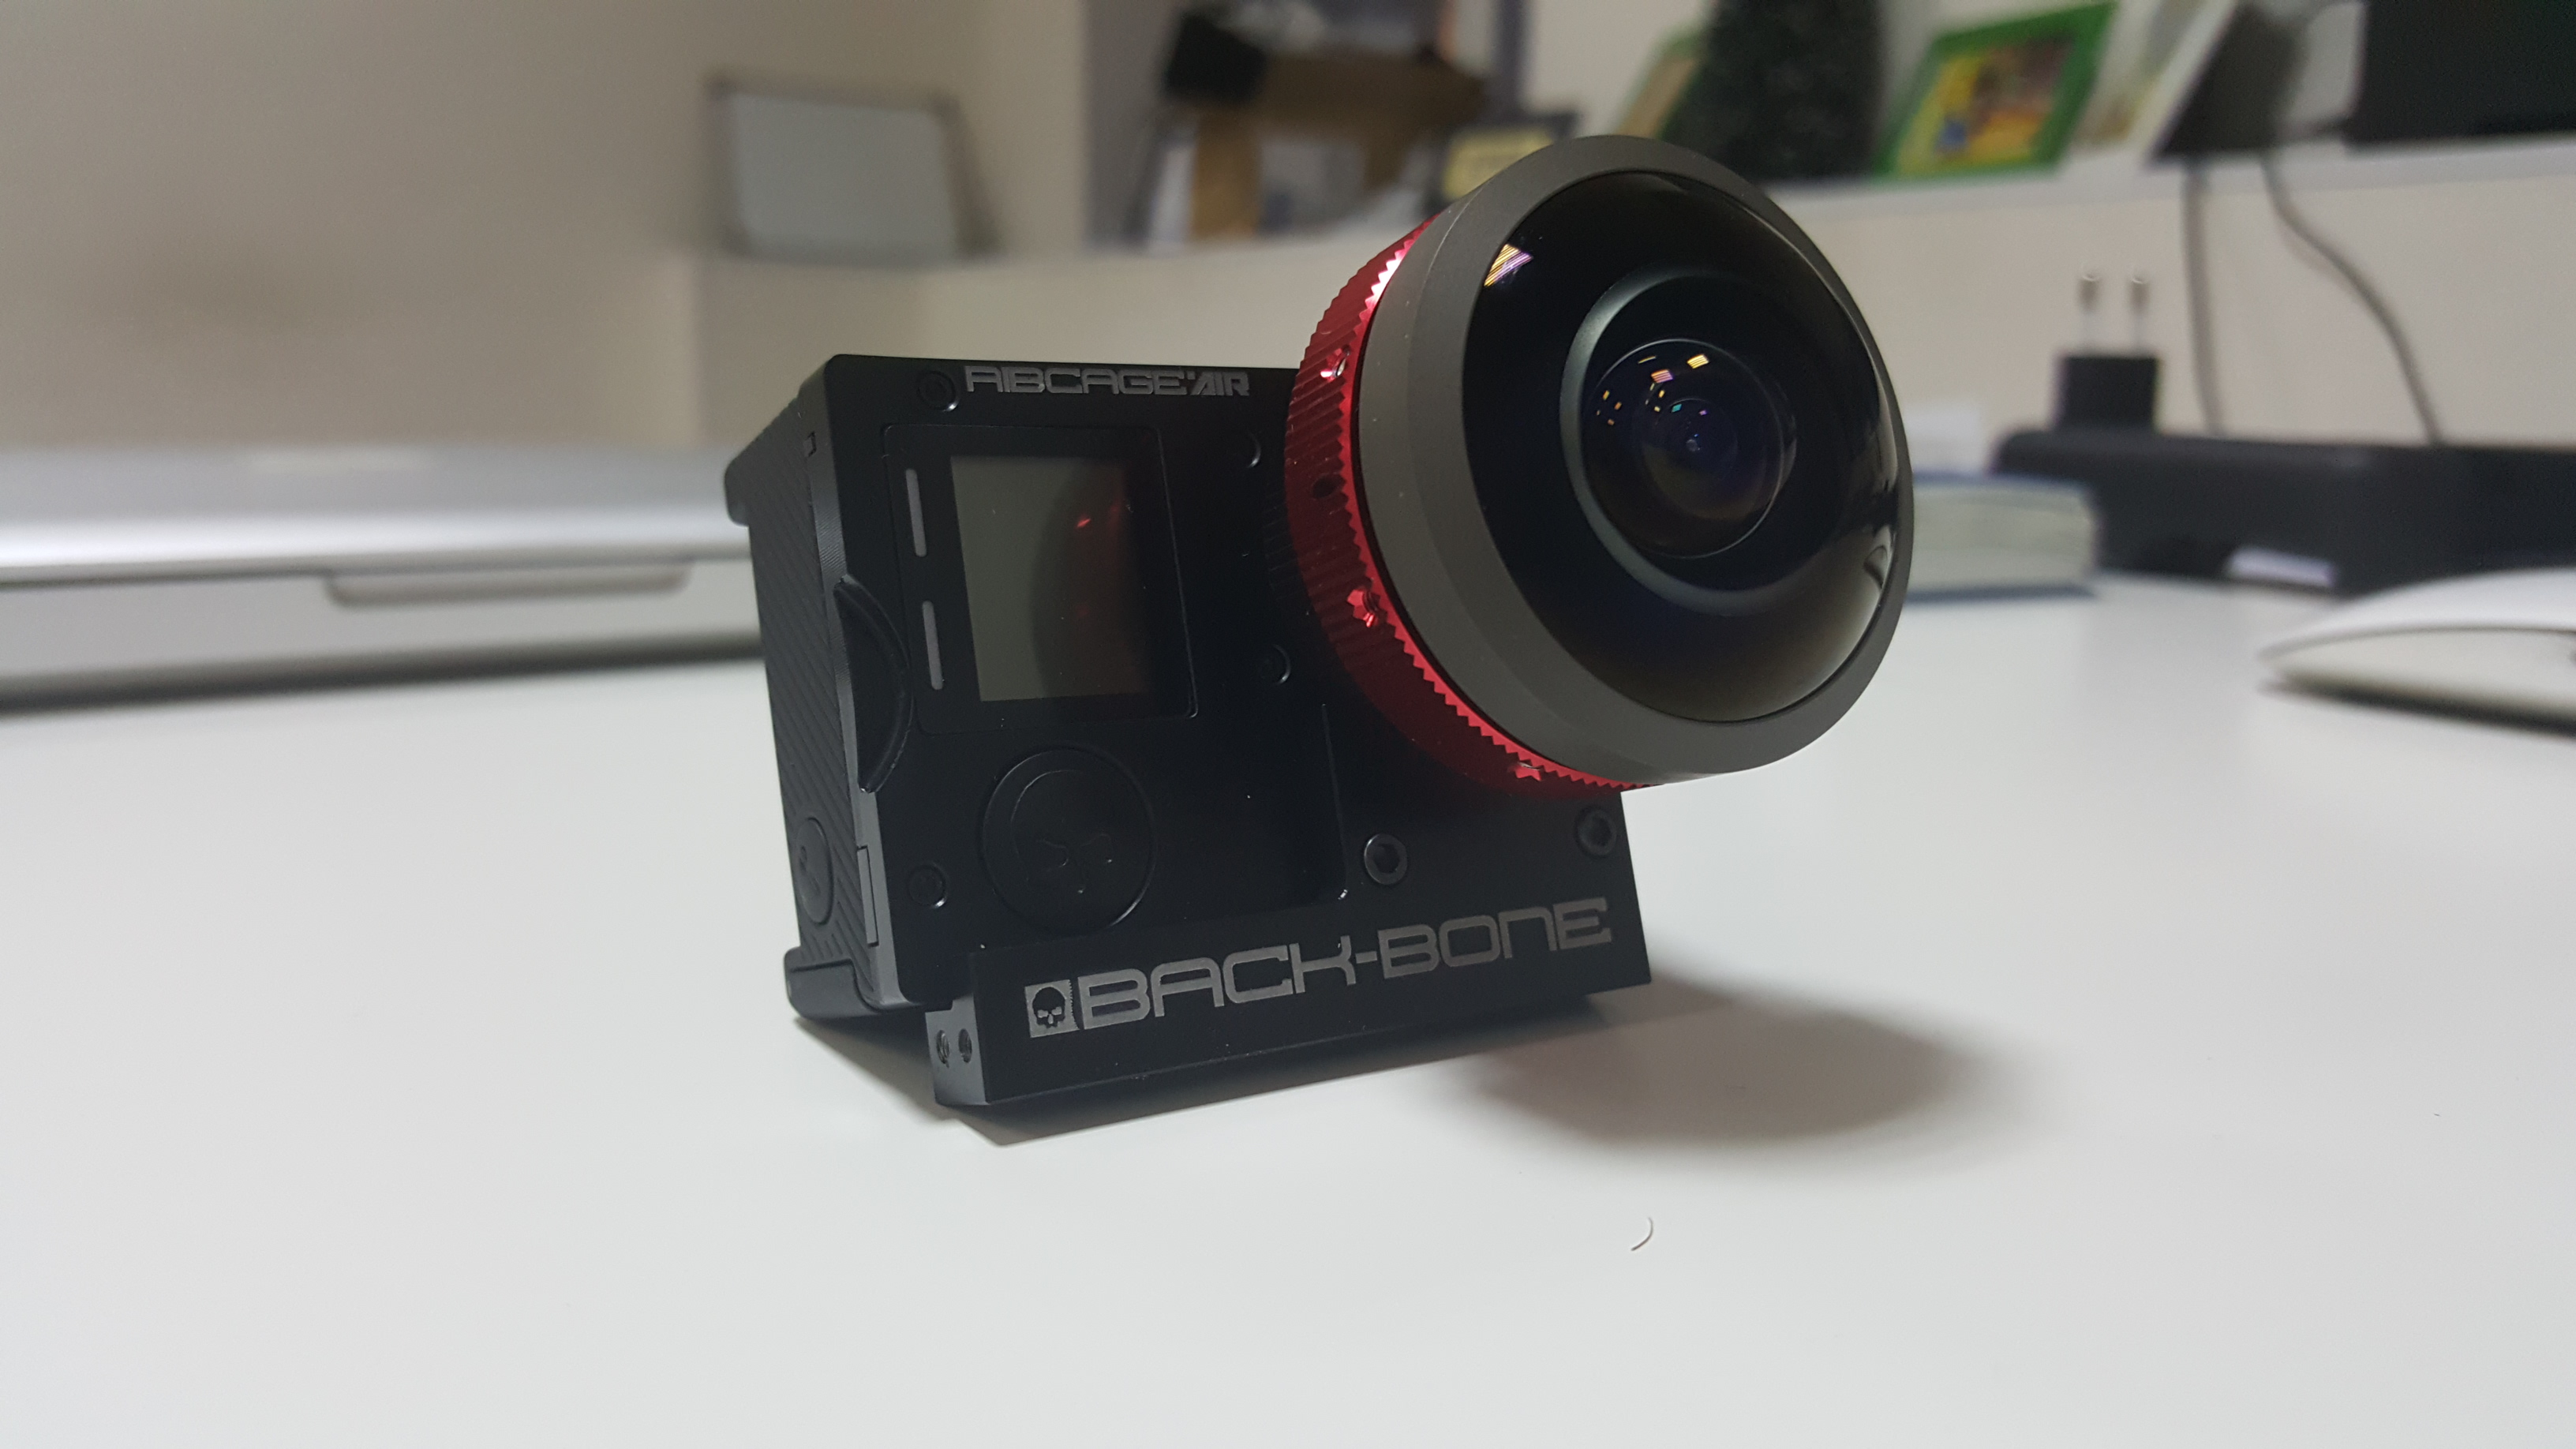
Using super wide fisheye lens makes it possible to cut the number of cameras and, therefore, stitches in the panorama. Besides, they provide a large overlap, which allows stitching panoramas shot in small premises.
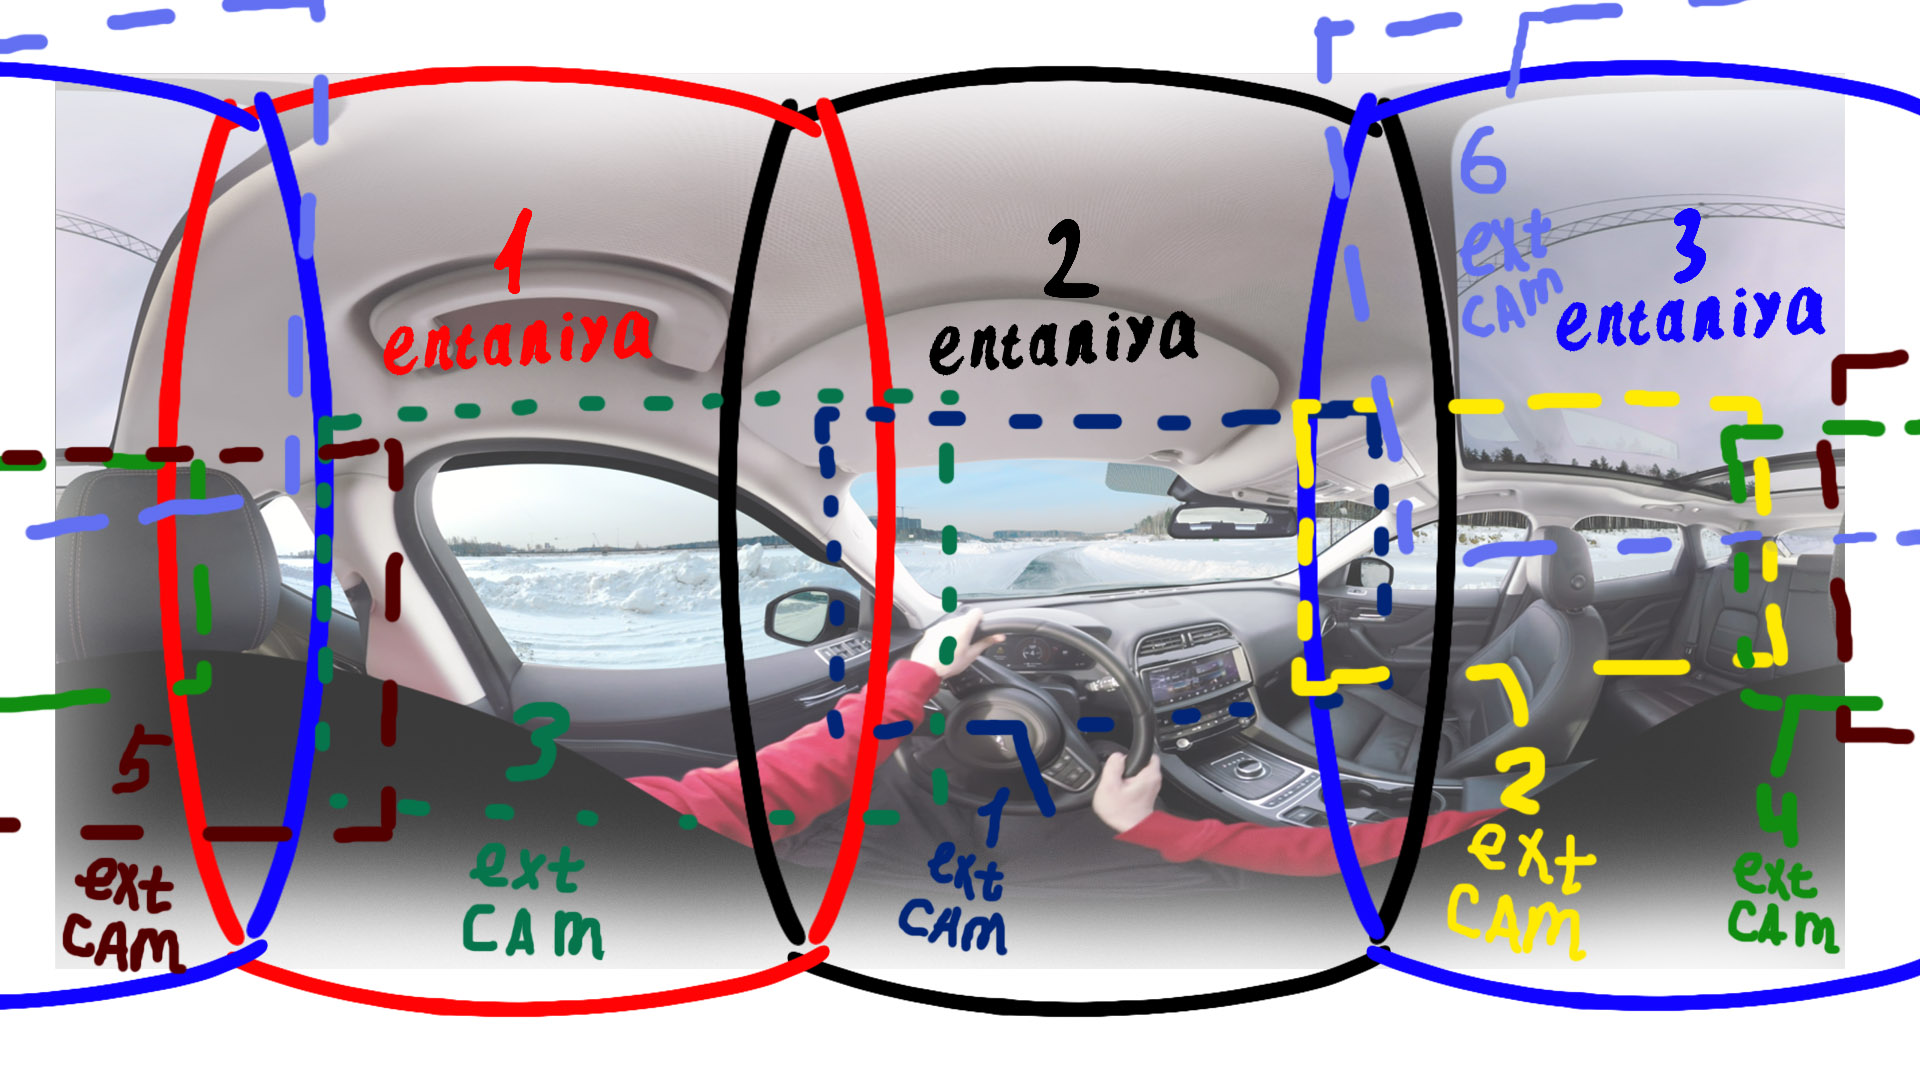
Secondly, we decided to complement this rig with additional exterior-focused cameras, namely, focused on each car window. Moreover, the camera should capture full window, it means horizontally located cameras and camera angle are to be set just before shooting.
Using these cameras we wanted to set correct exposition outside and achieve high resolution exterior shooting.
Eventually we needed to set three more cameras to get rid of occlusions – we’ll talk about this later.
After stitching and compositing we should have this panorama.
That’s all? Done? Nothing of the kind.
To be continued…
Great stuff, very inspiring!