

Lifehacks on shooting VR 360 video or how to simplify your life during postproduction
Having bidden farewell to Krasnodar sun, we have come back home.
The previous article on how we shoot Porsсhe Panamera Turbo can be read here.
The shooting was over, it was time to review materials. Now, our favorite stage, the postproduction” had been awaiting.

So, having considered and mapped a course of actions, we have begun.
The car with metal rods pricking up from bonnet resembles attack of the tripod from “The War of the Worlds”,

therefore, we had to fight it, just as Tom Cruise did. We had to recover all the ulterior area of the image. From time to time some crazy ideas come into the head, however, they can be quite applicable, if simplify work.

So, here they are:
Lifehacks by U360
1. A take with other grip
It’s time to say to yourself – “Thanks from headpiece at shooting site!”. If you have used a trick described in the previous article, the most part of occlusions could be easily and conversationally removed.
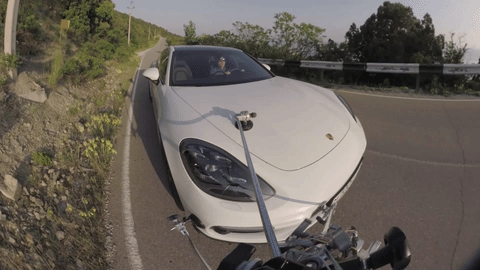
Some disadvantages:
a) there is a necessity of additional stabilization and tracking;
b) there is some junction within occlusions and shadows.
2. Additional cameras
As we wrote before, we have used additional cameras for the synchronous shooting of areas covered with occlusions. This helped us elaborating headlights and the road under the mount.

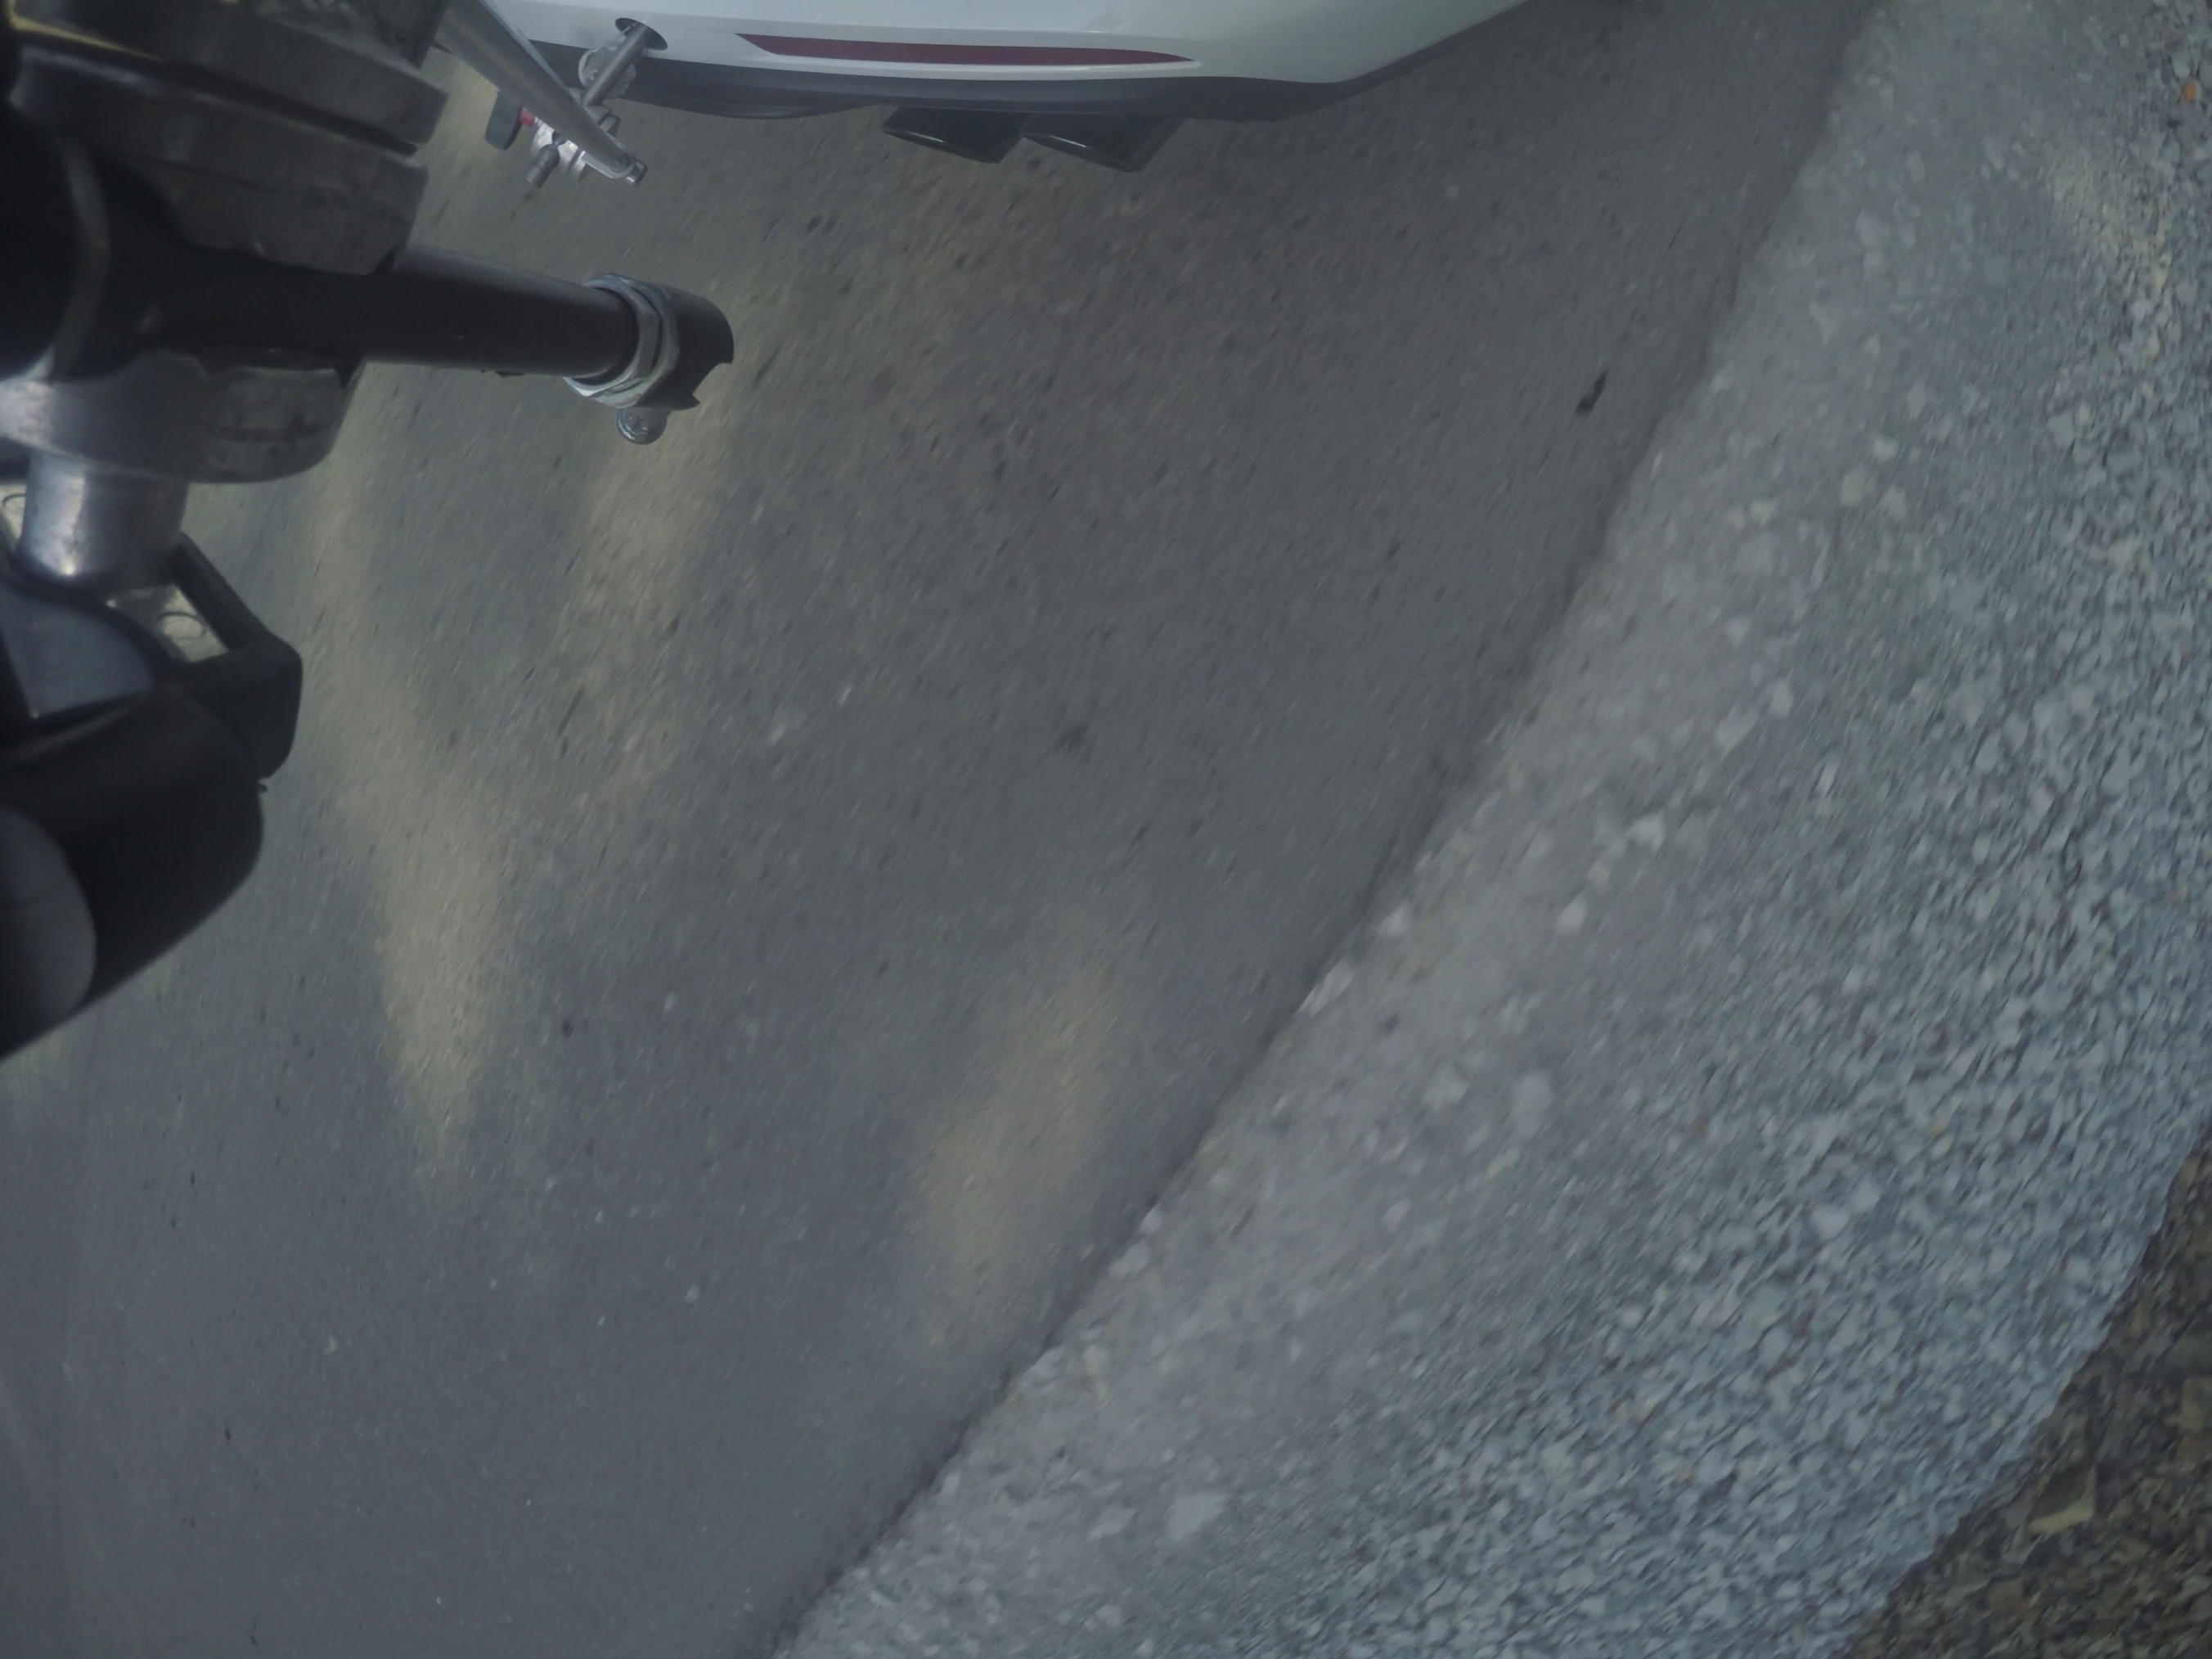
The main thing here is the elaboration of GoPro lens’ distortions and the simulation of Entaniya distortion.
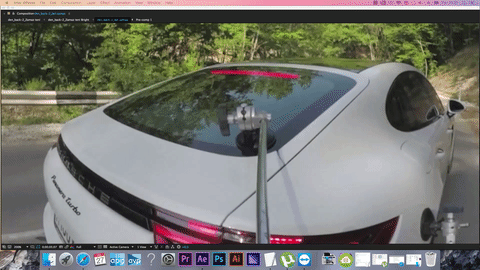
3. A trick with “time machine”
When you work with consistently moving images, to remove occlusion you can use a trick implying change of moving object’s position as time goes. I shall explain it by the example:
The sucker is fixed on the window, in which one can see dynamic reflections. We cannot take the situation up with help of static shot compositing, since image changes with each frame. Where can we find the missing info? It’s easy: in the past.

One should just take the necessary reflection from one of several previous frames and transfer it to the area with occlusion. Then, one is to track the image remains synchronized throughout the entire frame. By the way, it’s not necessarily to do the work in extra delicate manner, it’s all the same – no one will notice detailed elaboration in motion with blurring.
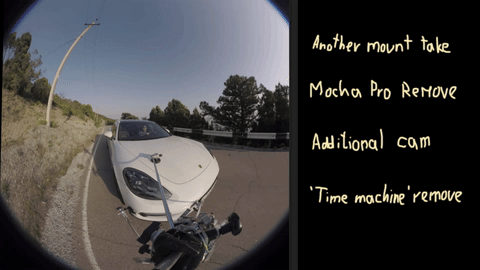
The same trick can be used to remove, for an instant, the mount’s shadows on the road. However, it works only with moving flat surfaces upon the condition of absence of visible parallax. In addition, one should use it just when prompt and rough solution looks in place. In other cases it is not worth fiddling around and better to automatize the process – for example, by using Mocha Pro Remove.
4. Mocha Pro
The plugin works in the same way: it analyzes dynamic image and add the necessary information taken from other frames. Plus, it analyzes lighting and object’s position orientating by area around occlusion.

Sounds easy: you track, adjust and render – and it’s ready. However, it not always work in such a mode. We had to use the Clean Plate function – when under definite step of timing one have to export the frame to Photoshop, clean it with its help and then watch – if Mocha have inserted it to the frame correctly. All these are rather time-consuming and require a powerful graphics card, so we recommend to put this variant aside as a last resort.

We have used all these techniques during clean-up, and here is what we’ve got:
Due to using such an irregular approach out image had been almost cleaned and we have proceeded to the next stage – the Stitching.
We were working in Autopano Video 3.0 and were quite lucky, since as early as during beta-testing we could assess just an excellent tool called AVP – D.WARP!
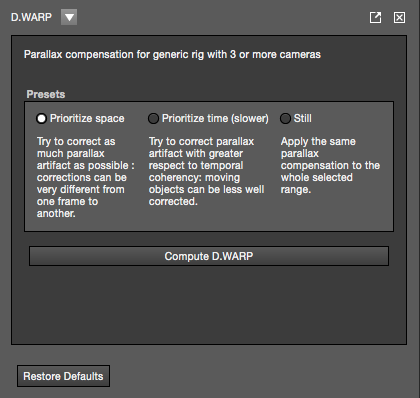
This tool designed for automated correction of parallax errors. Let have it straight – it is not appropriate to every situation.

However in our case, it represents an ideal variant!
Keep it in mind:
4 Entaniya + camera motion + D.WARP = MAGIC!

It’s enough to push the button and you won’t have to deal with stitches!
The only remaining thing is to color the shot.


And render it. It’s all. Keep well. Go to sleep.
